Summer Sale! | Call or Text
(866) 698-6690
Summer Sale! | Call or Text
(866) 698-6690


So you’ve finally committed to buying a home sauna—now comes the big question: where should you put it? Unless your house was built with a sauna in mind, it’s unlikely you have a large, dedicated space available inside. This is why many people turn to their garden for an outdoor sauna, or consider installing a sauna in their basement.
A basement can be an excellent location for a sauna, offering privacy, sound insulation, and year-round usability. However, there are some critical factors to consider before getting started. From moisture control and ventilation to flooring and electrical setup, proper planning is essential to ensure your basement sauna is safe, efficient, and long-lasting.
This guide will walk you through everything you need to know before building a sauna in your basement, including key considerations, potential challenges, and expert tips to get the most out of your home sauna setup.
Why Build a Sauna in Your Basement?
If you don’t have space elsewhere in your home, the basement can be a practical option for installing a sauna. While not the most common location, it offers a few key advantages that make it a solid choice for many homeowners.
-
Helps Contain Heat Without Overheating the Rest of the Home
Saunas generate a lot of heat, which can warm up surrounding rooms. When installed near living spaces like bedrooms or bathrooms, this can lead to unwanted temperature increases, especially in the summer. Basements maintain a cooler, more stable temperature year-round, meaning any extra heat from the sauna is less likely to spread to the rest of the house. -
Makes Use of Unused Space
Many basements become storage spaces filled with boxes and items that are rarely used. Converting part of the basement into a sauna transforms the area into a functional wellness space. Some homeowners even pair their sauna with a home gym, allowing them to step straight into the sauna after a workout. -
Can Be More Cost-Effective Than an Outdoor Sauna
If you were considering an outdoor sauna but don’t want to deal with weatherproofing, foundation work, or running electrical lines outdoors, a basement installation can be simpler and cheaper. Basements are already enclosed and insulated, which helps retain heat and lowers energy costs compared to placing a sauna in a colder, draftier space.
While a basement sauna isn't the first choice for everyone, if you don’t have room elsewhere, it can be a practical and effective way to add a sauna to your home without taking up valuable living space.
Can You Build a Sauna in Your Basement?
Absolutely. If you don’t have space for a sauna elsewhere in your home, a basement can be a great option. Whether you’re purchasing a DIY sauna kit or an infrared sauna, installation is often easier than you might expect. The key considerations are space, ventilation, and power supply.
Most infrared saunas are the simplest to install, as they typically arrive pre-assembled and plug into a standard 110V outlet. Traditional saunas require a bit more work, as they often come as a kit with pre-cut panels that need to be secured together, and they require a professionally wired heater.
How to Build a Sauna in Your Basement: Step-by-Step
Building a sauna in your basement is an exciting project, whether you're setting up one of our modular sauna kits or assembling an infrared sauna. Here’s what you need to know:
1. Plan the Space
Start by assessing your basement to find the best location for your sauna. While basements often have limited natural ventilation, selecting a spot with good airflow and accessibility is crucial.
-
Minimum ceiling height – Aim for at least 7 feet to allow for proper heat circulation.
-
Corner spaces – A great option since they utilize two existing walls, reducing build costs.
-
Proximity to power – If installing an electric sauna heater, check that your electrical system can handle the load.
|
Pro Tip: If space is limited, consider a pre-fabricated indoor sauna kit, which comes with pre-cut panels for easier installation. |
2. Choose the Type of Sauna
Before installing, you need to decide which sauna type is best for you:
-
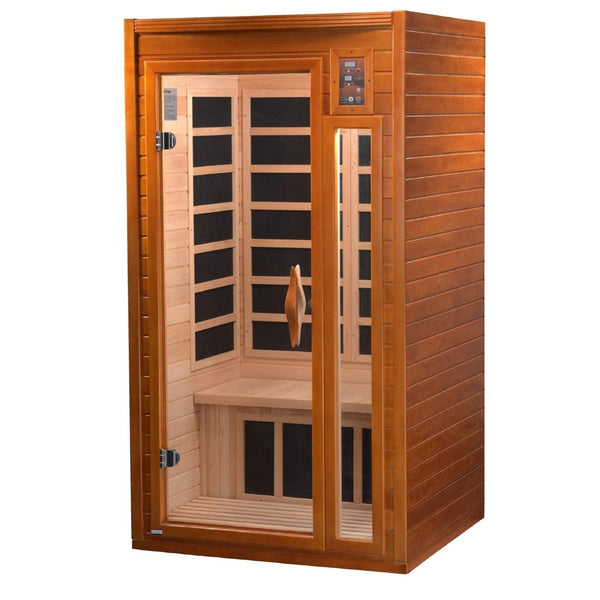
Infrared Sauna: The easiest option. Most models arrive partially pre-assembled and clip together in a matter of minutes. Many infrared saunas plug into a standard wall outlet, eliminating the need for professional wiring.
-
Traditional Sauna: Requires more assembly but provides a more immersive experience. Most DIY sauna kits come with pre-cut panels that need to be secured together, and the heater must be professionally wired into a dedicated circuit.
Traditional saunas generally need a more extensive electrical setup and moisture management. While an infrared sauna, on the other hand, is simpler to install and requires less power.
If you're on a budget or want the simplest installation, an infrared sauna is the easiest choice. If you want the most authentic experience, go for a traditional sauna kit.
3. Ensure Proper Ventilation
While saunas don’t require complex ventilation, it’s important to ensure fresh air circulation in your basement. Without ventilation, humidity can build up and cause damp issues.
-
For traditional saunas, most manufacturers recommend an intake vent near the heater and an exhaust vent on the opposite side to allow proper airflow. If your basement doesn’t have existing airflow, a small exhaust fan may be needed.
-
For infrared saunas, ventilation is less of a concern, as they don’t generate large amounts of steam or humidity. However, proper airflow is still recommended to keep the space comfortable.
The ventilation system should be connected to the outside of the house if possible. If this is not an option, consider a fan that pushes the air to another room with proper ventilation, such as a bathroom.
If your basement tends to be humid, it may also be worth using a dehumidifier in the surrounding space to prevent moisture buildup.
4. Assemble the Sauna
The assembly process depends on whether you’ve chosen an infrared sauna or a traditional sauna kit:
-
Infrared Sauna: Arrives in pre-built panels that simply clip together. The entire process can take under an hour and requires minimal tools.
-
Traditional Sauna Kit: Comes with pre-cut panels that must be screwed or nailed together. The benches, heater, and door need to be secured, and basic woodworking skills may be required. Expect 4-6 hours for full assembly.
5. Wire in the Sauna Heater

Once the sauna is assembled, the next step is to wire in the sauna or heater:
-
Infrared saunas have built-in heating panels and many of the smaller 1-2 person models require no additional setup—simply plug it in and turn it on. Larger models over 2kW may require an electrician for installation.
-
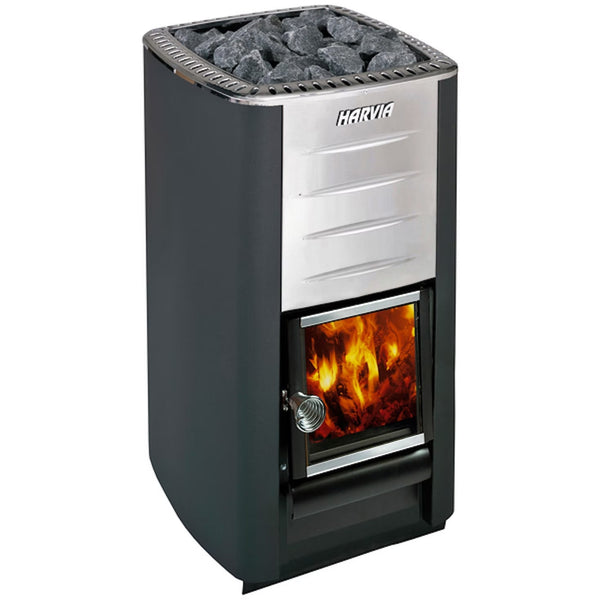
Traditional saunas use an electric sauna heater. These must be professionally installed and wired to a dedicated circuit.
6. Final Touches
Once the main structure of the sauna is complete, you can add finishing touches to make your sauna truly relaxing:
-
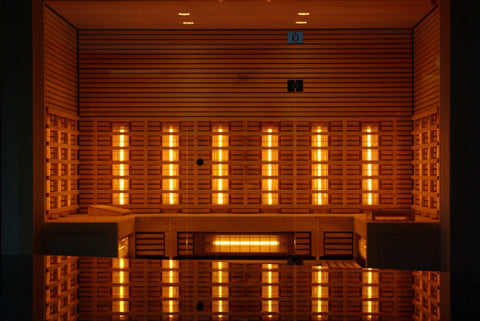
Lighting: Use LED lights specifically made for saunas. These lights will withstand high heat and provide a soothing ambiance.
-
Thermometer and Hygrometer: These are essential tools to monitor the temperature and humidity levels within your sauna.
-
Sauna Accessories: Consider adding towel hooks, a timer, a bucket, and a ladle. These accessories can improve your sauna experience.
If you want to take it a step further, you can add aromatherapy diffusers or mood lighting to enhance the experience.
|
Pro Tip: If you’re installing a traditional indoor sauna, let it run for at least an hour on its first use to burn off any residual materials from manufacturing. |
Recommended Sauna Models for Basements
If you're looking to make the most of your basement space while enjoying the benefits of a personal sauna, the following models are great options. Whether you're after a plug-and-play infrared sauna or a traditional sauna kit, these models are designed to fit compact spaces while providing the full sauna experience.
|
Dynamic Saunas Barcelona 1-2 Person Low EMF Far Infrared Sauna |
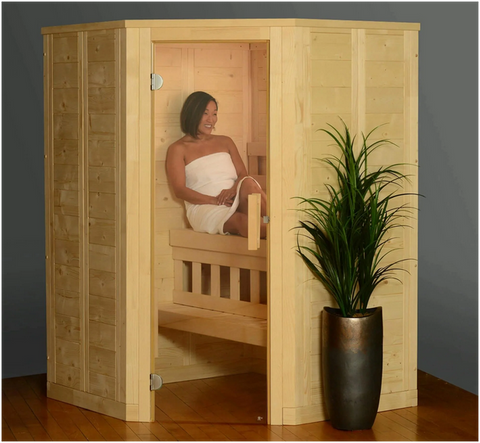
Almost Heaven Auburn 2-3 Person Indoor Sauna |
Maxxus 2-Person Full-Spectrum Infrared Sauna |
|
|
|
|
|
|
|


Designed to fit seamlessly into smaller spaces, this sauna offers comfort and relaxation without sacrificing precious square footage, making it an ideal addition to any basement.
Basement Sauna Kit vs. DIY Sauna Build
When installing a sauna in your basement, you have two main options: buying a sauna kit or building one from scratch. Each has its advantages depending on your budget, experience, and customization needs.
Sauna Kit for Basements
A sauna kit comes with pre-cut materials and all necessary components for quick and easy installation. Kits are ideal for those who don’t have the time or expertise to build a sauna from scratch.
Advantages:
-
Faster installation – Most kits can be assembled in 4-6 hours with two people.
-
Designed for efficiency – Proper ventilation, heat distribution, and electrical components are pre-planned.
-
Customizable – Many kits allow upgrades like glass doors, different wood options, and heater types.
Best for: Homeowners who want a high-quality sauna with minimal effort and a manufacturer's warranty.
DIY Basement Sauna Build
Building a sauna yourself offers complete customization but requires more time, skill, and planning. You’ll need to handle electrical work, ventilation, and securing materials yourself.
Advantages:
-
Full control over design – Customize the size, materials, and layout to your exact specifications.
-
Potentially cost-effective – If you have the tools and skills, a DIY build may save you money on labor.
Best for: Those who enjoy DIY projects and have carpentry and electrical experience.
Find the Perfect Sauna for Your Basement
A basement sauna is a great way to maximize your home’s potential, adding a private retreat for relaxation, detoxification, and recovery. Whether you assemble a sauna kit for a hassle-free setup or take on a DIY build, the key is choosing a model that fits your space and needs.
We offer a range of indoor and infrared sauna options to suit different basement layouts:
-
Indoor Traditional Saunas – Traditional saunas with electric heaters designed for home use.
-
Infrared Saunas – Low EMF infrared sauna kits that plug into a standard outlet for easy installation.
Browse our full collection and find the best sauna for your basement today!